Motion sensor LED stair lighting has become a popular feature in modern residential interiors. It offers hands-free operation, creates a distinctive architectural effect and allows staircases to be illuminated automatically when someone approaches.
However, installing a motion-activated staircase lighting system involves more than attaching an LED strip beneath the steps. Sensor placement, controller compatibility, power distribution and the lighting sequence all affect the final result.
This guide explains how to plan and install a 24V motion sensor LED strip lighting system, including the practical details that installers should check before beginning a project.
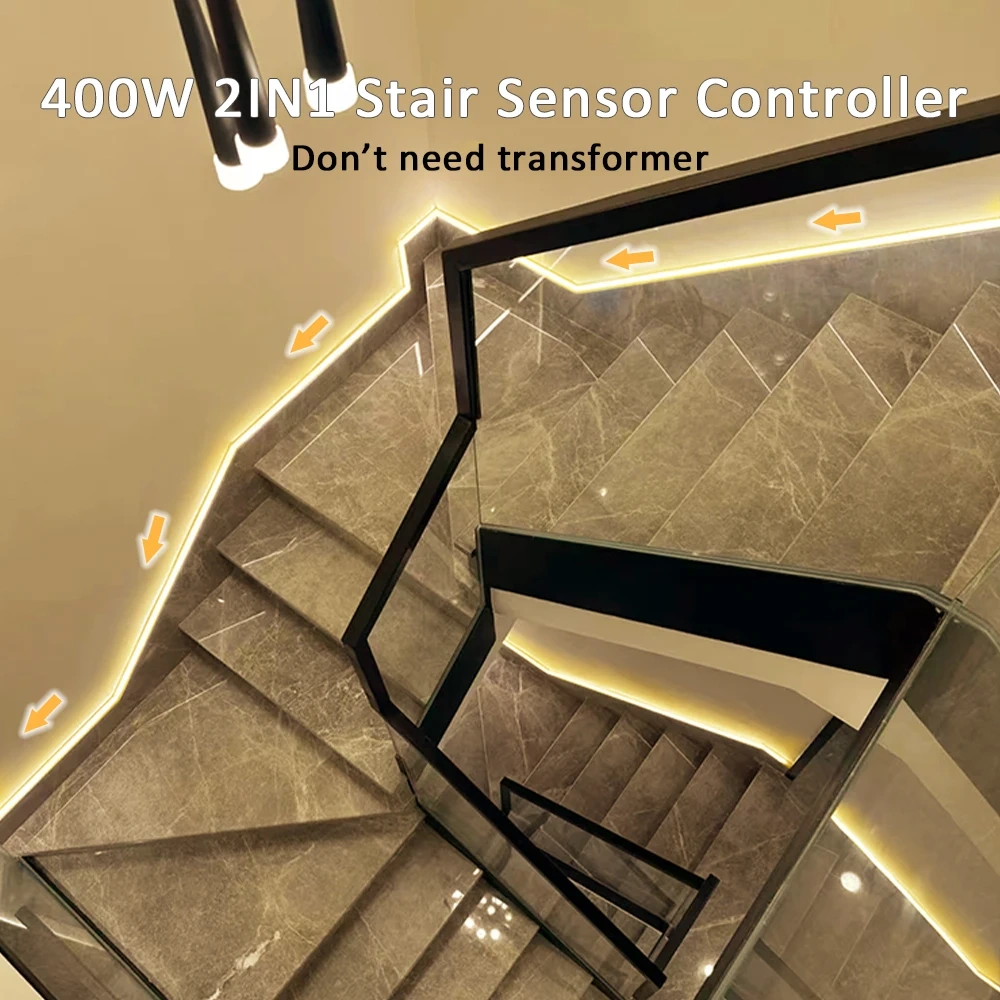
A typical automatic staircase lighting system includes LED strips, a controller, motion sensors and a power supply.
When a person approaches the staircase, a sensor detects movement and sends a signal to the controller. The controller then activates the connected LED lighting.
Depending on the controller and LED strip technology, the system may switch on immediately or create a progressive lighting sequence.
For example, a compatible SPI COB LED strip can produce a water flow effect, where the illuminated section gradually extends along the strip.
Many staircase lighting controllers also support adjustable brightness, animation speed and automatic switch-off timing.
A dual-sensor system can detect people approaching from either end of the staircase.
2. Choose the Right LED Strip Before Installation
Not every LED strip is suitable for dynamic staircase lighting.
Standard single-color LED strips generally illuminate as one continuous circuit. If the installation requires progressive animation, the strip and controller must support compatible addressable control.
For a motion sensor staircase project, consider the following characteristics.
Operating Voltage
A 24V LED strip is a practical option for many indoor staircase installations.
Compared with a similar 12V strip operating at the same power, a 24V system draws approximately half the current. This can simplify power distribution and reduce resistive voltage losses under comparable wiring conditions.
However, voltage drop still needs to be calculated, especially on longer runs.
LED Density
High-density COB LED strips produce a more continuous line of light than many traditional low-density SMD strips.
This is useful when the LED strip is installed in a visible location or behind a shallow diffuser.
Strip Width
The LED strip must fit the selected aluminum profile or mounting channel.
A 10mm PCB, for example, requires a profile with sufficient internal clearance for the strip and any connectors.
Controller Compatibility
If the project requires water flow animation, confirm that the controller supports the exact SPI protocol, pixel configuration and wiring arrangement of the selected strip.
A standard PWM dimmer cannot independently control addressable pixels.
3. Plan the Staircase Lighting Layout
Before ordering components, measure the staircase and determine where the lighting will be installed.
Common installation positions include:
-
Beneath the front edge of each stair tread
-
Inside a recessed stair nosing profile
-
Along the staircase sidewall
-
Beneath a handrail
-
Along a continuous architectural lighting channel
For under-step lighting, a downward-facing installation is often preferable because it can illuminate the tread while reducing direct glare.
The exact placement should also account for cleaning, mechanical protection and access for future maintenance.
Measure the Required Strip Length
Suppose a staircase contains 15 steps, each requiring 0.8m of LED strip.
The total LED strip length would be:
15 × 0.8m = 12m
This calculation excludes connecting wires, bends and installation allowances.
If the system uses a continuous animated strip, additional planning may be required to maintain the intended sequence between steps.
4. Select Suitable Aluminum Profiles
Although some LED strips can be installed using adhesive backing, aluminum profiles are often preferable for permanent architectural installations.
They provide a stable mounting surface, help dissipate heat and can protect the strip from accidental contact.
For staircase projects, choose a profile based on the mounting position and desired light distribution.
A recessed profile may be suitable for new construction, while a surface-mounted profile can simplify retrofit projects.
A diffuser can also help soften the visible light line.
Avoid installing exposed LED strips where they may be stepped on or damaged during routine cleaning.
5. Position the Motion Sensors
Sensor placement is one of the most important parts of the installation.
For a dual-sensor system, one sensor is normally installed near the bottom of the staircase and the other near the top.
Both sensors should detect approaching movement before a person enters the main stairway.
However, sensor performance depends on the sensing technology, detection angle, mounting height and surrounding environment.
A sensor installed too close to a doorway may activate repeatedly when people walk past.
A sensor placed behind an obstruction may fail to detect movement reliably.
Before permanently mounting the sensors, test their detection zones under normal operating conditions.
6. Install the LED Strip and Wiring
Once the layout has been confirmed, install the mounting profiles and prepare the LED strip.
Clean the mounting surface and ensure that it is dry.
Follow the manufacturer's instructions for cutting, bending and connecting the strip. Addressable LED strips must only be cut at approved locations.
Where separate strips are installed on individual steps, route the connecting wires through protected channels.
Avoid sharp bends, unsupported connections and exposed wiring near walking surfaces.
Understanding the Wiring
A typical addressable LED strip requires a positive supply connection, a negative return and one or more control signal connections.
However, wire colors are not universal.
Always use the wiring diagram for the exact strip and controller supplied.
Do not assume that a green, white or red wire has the same function across different products.
For a system with an integrated AC power supply, the mains input must also match the local electrical supply.
For example, a controller rated for AC 175–265V cannot be connected directly to a 110V mains supply.
Mains wiring should be performed by a qualified electrician in accordance with applicable regulations.
7. Calculate the Power Requirements
Power calculations are essential for reliable operation.
Consider a 24V COB LED strip rated at 11.52W per meter.
For a 10m installation:
10m × 11.52W/m = 115.2W
For a 15m installation:
15m × 11.52W/m = 172.8W
These values represent the nominal strip load, before accounting for controller losses and any additional system components.
The power supply must be selected according to the manufacturer's recommendations, with appropriate allowance for operating conditions.
For long installations, calculate voltage drop and determine whether additional power injection is necessary.
A controller's maximum wattage rating does not automatically guarantee that every connected strip length can be powered from a single feed point.
8. Configure the Stair Lighting Controller
After completing the wiring and checking the electrical connections, configure the controller.
Depending on the model, adjustable settings may include:
Brightness: Sets the illumination level.
Animation Speed: Controls how quickly the water flow effect travels along the strip.
Pixel Number: Defines the number of controllable pixels or segments.
Lighting Direction: Determines the direction of the progressive lighting effect, where supported.
Switch-Off Delay: Determines how long the lighting remains active after the relevant trigger or control event.
Some controllers offer delay settings such as 2, 10, 20, 40, 60 and 80 seconds.
The appropriate setting depends on the staircase dimensions and expected usage.
For a long staircase, the delay must provide sufficient time for occupants to move safely through the area.
9. Test the System Before Final Installation
Before closing cable channels or completing decorative finishes, test the entire installation.
Walk toward the staircase from both directions and check whether the sensors activate consistently.
Verify that the lighting sequence follows the intended direction and that all connected sections illuminate correctly.
Check for flickering, unexpected shutdowns, uneven brightness and excessive heating.
Allow the system to operate for an extended test period before final handover.
Also verify that the staircase meets applicable safety lighting requirements. Decorative motion-activated strips should not be assumed to replace required permanent or emergency illumination.
10. Common Installation Problems
Only Part of the LED Strip Illuminates
Possible causes include incorrect pixel settings, signal wiring errors, incompatible controller protocols or insufficient power distribution.
The LED Strip Flickers
Check the power supply capacity, connection quality, voltage at the far end of the strip and controller compatibility.
The Motion Sensor Does Not Respond
Confirm the sensor wiring, detection range, installation position and controller settings.
The Lighting Effect Runs in the Wrong Direction
Check whether the controller supports direction adjustment and verify the data flow direction of the addressable strip.
The Strip Becomes Excessively Hot
Check the installed power level, mounting surface, ventilation and thermal management.
11. Choosing a Complete Stair Lighting Kit
For many residential and renovation projects, a complete kit simplifies component selection.
A compatible package can include the LED strip, controller, motion sensors and installation accessories.
USKYLED offers a 24V motion sensor staircase lighting kit with 5m, 10m and 15m strip options, dual sensors and adjustable dynamic lighting effects.
The system is designed for indoor staircase and corridor applications.
Project buyers should confirm the required length, color temperature, controller input voltage and installation arrangement before ordering.
Conclusion
Installing motion sensor LED strip lights on stairs requires careful planning, particularly when the design includes progressive lighting effects.
The most reliable results come from matching the LED strip with the correct controller, selecting suitable mounting profiles, calculating the power requirements and testing the sensor positions before completing the installation.
For residential lighting contractors and architectural lighting designers, a well-planned 24V system can provide a practical combination of automatic operation and modern visual design.
Explore the USKYLED 24V Motion Sensor Stair LED Strip Light Kit:
https://www.uskyled.com/products/pir-motion-sensor-led-stair-lighting-kit
For custom staircase lighting projects, contact USKYLED with your installation dimensions, required quantities and lighting specifications.


